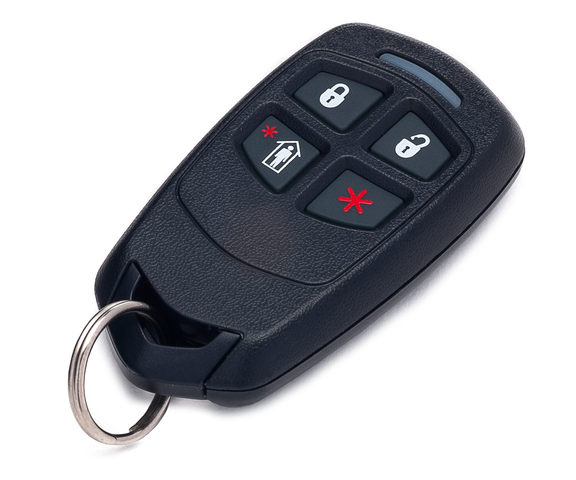
One of the most versatile security key fobs on the market today is the Honeywell 5834-4. This is a wireless four button key fob with up to eight different programmable functions. The device will function from up to 50 feet away from the system. This makes the 5834-4 a convenient tool for quickly arming and disarming your system and performing other useful functions. This helpful guide will tell you everything you need to know about the 5834-4 key fob so that you can fully integrate it into your security setup.

Overview of the 5834-4 and Other 5800 Series Key Fobs
The Honeywell 5834-4 is actually the same security key fob that ADT provides for their monitored customers. This means that an ADT Key Fob can generally be used in the exact same manner as a 5834-4. If an ADT customer decides to leave ADT, they will most likely be able to use their old ADT Key Fob with their new monitoring company. A user can program their old ADT Key Fob with any compatible alarm system, even if the device has not been deleted from the old system. That said, we do recommend deleting the device from the old system if possible.
The 5834-4 is recognized as a wireless sensor from the Honeywell 5800 Series. Just like the other devices in this lineup, the 5834-4 Key Fob operates at a wireless frequency of 345 MHz. It will interface with any control panel that utilizes this wireless frequency. This includes the Honeywell Lyric Controller, Honeywell LYNX Touch Panels, Honeywell VISTA Panels (with an added wireless receiver), the 2GIG GC3 and the 2GIG GC2. In order to achieve the maximum functionality of the device, the 5834-4 will require eight separate wireless zones on the system.
The 5834-4 can perform system commands at a maximum distance of up to 50 feet away from the alarm system, though a Honeywell 5800RP Wireless Repeater can be used to extend this range. Also, any button press that is made using the 5834-4 must be held down for half a second before the programmed action will go into effect. This helps to prevent potential false alarms caused by the key fob.
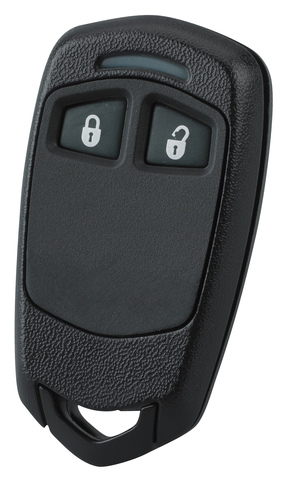
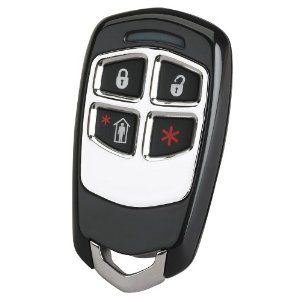
In addition to the 5834-4, Honeywell produces two other key fob devices that are very similar in terms of use. The 5834-2 features two buttons and up to three programmable functions. This two-button key fob is a good option for users who do not require a device with as many functions as the 5834-4. Honeywell also offers the 5834-4EN. This is literally the exact same device as the 5834-4. The only difference is that the 5834-4en features a design with a pleasant silver finish.


Enrolling the 5834-4
Each function on a 5834-4 Key Fob is assigned its own wireless zone on a security system. This means that if every possible button entry is set up, the device will take up eight wireless zones. Each button entry can be learned-in with the security system, much in the same way as any other wireless security sensor. With the panel in its learn mode, press and hold the button entry you want to program. The panel will beep to let you know that it has recognized the key fob. Do this three times to auto-enroll that button press with the system.
Please note that some alarm panels will require you to use the panel's designated "key fob zones" to auto-enroll the 5834-4 with the system. For these panels, attempting to assign the 5834-4 with a non-key fob zone will require that the serial number be entered in manually rather than being learned-in automatically. While the 5834-4 can technically be used with any wireless zone, we always recommend assigning the device to a key fob zone if possible. The exact zone numbers for the key fob zones vary between different alarm panels.
Also note that most panels will have a specific sub-menu within programming for setting up key fobs. By setting up a 5834-4 through this sub-menu, the device inputs will automatically be assigned to a designated key fob zone on the system. Again, we strongly recommend setting up a 5834-4 key fob through the key fob sub-menu for the panel.
The table below outlines the key fob zone numbers for various types of alarm systems:
| Panel Type | Key Fob Zones |
| Honeywell VISTA-15P | 49-56 |
| Honeywell VISTA-20P & VISTA-21iP | 49-64 |
| Honeywell LYNX Touch | 140-147 |
| Honeywell Lyric Controller | 131-162 |
| 2GIG GC2 | 51-58 |
| 2GIG GC3 | 32 Key Fob Zones* |
| *Note: The 32 key fob zones on a 2GIG GC3 are considered separate from other wireless zones. | |
The 5834-4 uses two different 7-digit Serial Numbers. The second Serial Number is one digit higher than the first Serial Number. So for example, if the first Serial Number is 123-4567, then the second Serial Number would be 123-4568. The first Serial Number is used with all single-button presses, while the second Serial Number is used with multi-button presses. Each unique input is assigned a Loop Number 1-4. This means that each of the eight possible inputs will have a Serial Number and Loop Number combination that is unique from all the others. This is shown in the following diagram:

Note that each button is identified by a different letter. The button in the upper-left corner with the closed lock is Button A. The button in the upper-right corner with the open lock is Button B. The button in the lower-left corner with the person standing inside the house is Button C. The button in the lower-right corner with the asterisk (*) is Button D.
Please note that the button combinations of A+D and B+C are not used with the system. But all other two-button combinations are fair game. Serial Number 2 will be one digit higher than Serial Number 1. The following table outlines every Serial Number and Loop Number combination used with the 5834-4 Key Fob:
| Input | Serial Number | Loop Number |
| A | 1 | 3 |
| B | 1 | 2 |
| C | 1 | 4 |
| D | 1 | 1 |
| A+B | 2 | 1 |
| A+C | 2 | 3 |
| B+D | 2 | 4 |
| C+D | 2 | 2 |
Configuring the 5834-4
Once an input has been enrolled with the panel, you must then configure the settings for that input. The exact options for for this will vary depending on the type of panel that is being used. Most options are fairly self-explanatory and can be configured with relative ease. For example, below are the menu options displayed for a Honeywell LYNX Touch L7000, assuming that the device is being programmed through the key fob menu. Please note that these are essentially the same menu options that will also be displayed on any other Honeywell LYNX Touch Panel, as well as the Honeywell Lyric Controller. Make sure to save your changes when you have finished configuring the key fob settings.
Also take note of the different possible actions that can be used with each possible input:
Standard Mode vs. High-Security Mode
the 5834-4 Key Fob features two different transmitting modes. These are standard mode and high-security mode. Simply put, standard mode has the 5834-4 function as an unencrypted device, while high-security mode has it function as an encrypted device. Putting the 5834-4 into high-security mode will make it nearly impossible for others to hack or compromise the device. However, high-security mode is only compatible with alarm panels that support this feature. For panels that do not support this feature, the 5834-4 Key Fob must be placed in standard mode before it can be used with the system. Some panels that do not support high-security mode include the 2GIG GC3 and the 2GIG GC2.
To activate high-security mode on the 5834-4 Key Fob, press and hold the A+C+D buttons on the device simultaneously for five seconds. The LED light on the device will flash red to indicate that the device has been placed into high-security mode. Once in this mode, any input made using the 5834-4 Key Fob will cause the LED light on the device to flash red.
To activate standard mode on the 5834-4 KeyFob, press and hold the B+C+D buttons on the device simultaneously for five seconds. The LED light on the device will flash green to indicate that the device has been placed into standard mode. Once in this mode, any input made using the 5834-4 Key Fob will cause the LED light on the device to flash green.
The 5834-4 Battery
The Honeywell 5834-4 Key Fob uses a 3-volt CR2032 lithium battery. Every new 5834-4 comes included with a fresh battery that is already installed. The battery should last for about three to five years before requiring a replacement. As the key fob is used, the power that is supplied by the battery will being to slowly drop. Once the power drops below 2.3 volts, a low battery message will be displayed on the alarm system. Please note that this message will only appear if a button is pressed on the key fob. If the key fob is not used, then the panel will not recognize that the battery is low. Additionally, once the battery is low, the LED light on the key fob will no longer flash when an input is made. If the power drops below 2.0 volts, then the device will stop working entirely.
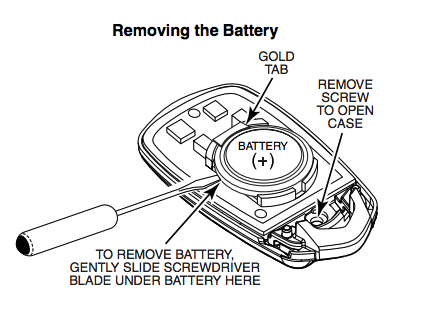
To replace the battery, use a small Phillips head screwdriver to remove the screw on the back of the device. Then slide a flathead screwdriver underneath the battery on the side with the gold tab to pop the battery out. With the old battery removed, slide the new battery into place, making sure that the positive (+) side is facing upwards. Firmly press down on the opposite side to click the battery into place. Finally, reapply the back cover, and screw it into place. Make sure to test the 5834-4 Key Fob after replacing the battery to ensure that it has been installed properly.

If You Need Further Help
The Alarm Grid support team is happy to help any monitored customer with using their 5834-4 Key Fob. Please contact us via email at support@alarmgrid.com or over the phone at 888-818-7728 from 9am-8pm ET M-F if you require further assistance.